Screenshots
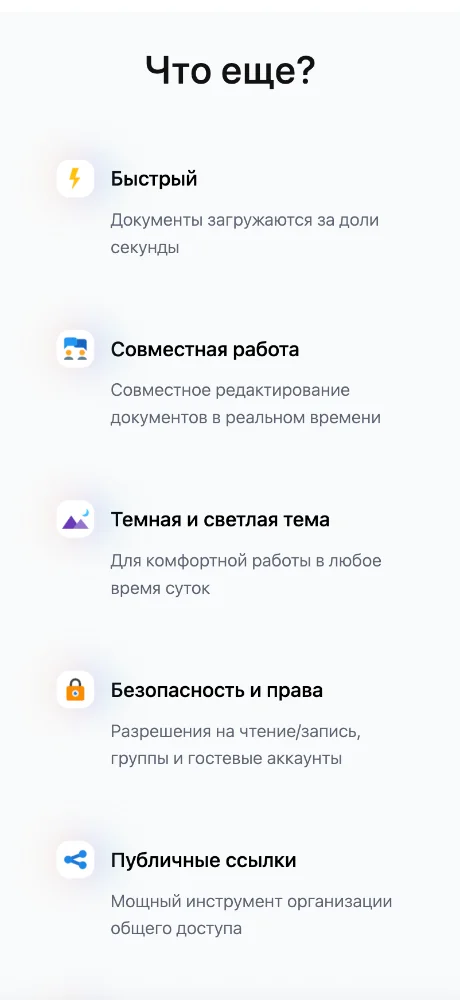
Similar apps
- Чат Рунета: AI for your everyday Russian conversations — ★ 4.7
- Just Bitcoin: Bitcoin price. Right when you need it. — ★ 4.6
- Cohere: Connect your business data to language — ★ 4.6
- Cirkl: Share everyday items with people you trust — ★ 4.6
- Outlook: Connect your email and calendar in one place — ★ 4.6
- ExhibitDay: Streamline your trade show planning — ★ 4.6
- Range co: Keep your team connected and on track — ★ 4.6
- Zero mail: AI-powered email client — ★ 4.5
Platform Compatibility
Want to have Yonote at hand like a regular app?
Want to have Yonote at hand like a regular app? Our guide with instructions for all browsers will help you install PWA quickly.
Opera - iOS
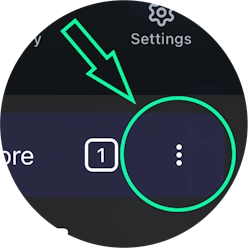
Open the browser menu (Opera icon in the bottom right corner) and find 'Add to Home Screen'
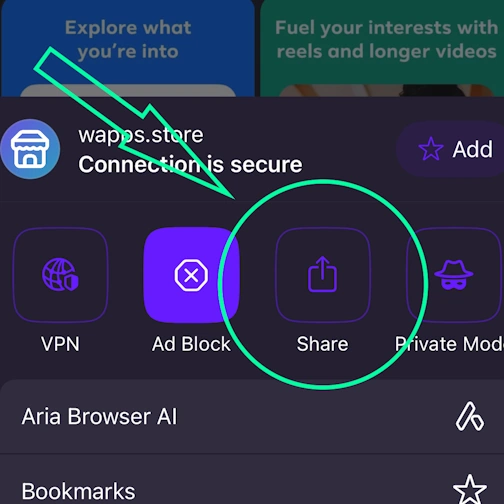
Here tap the Share button
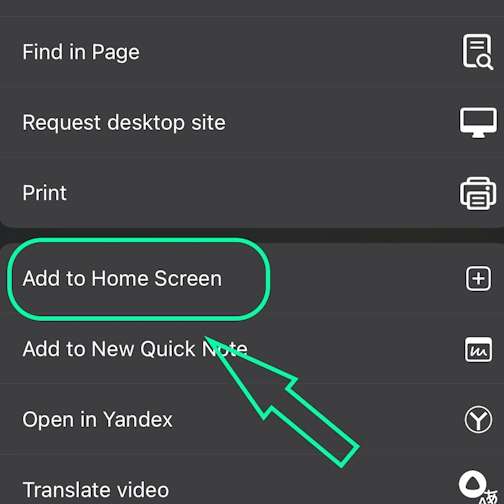
Select the option: Add to Home Screen
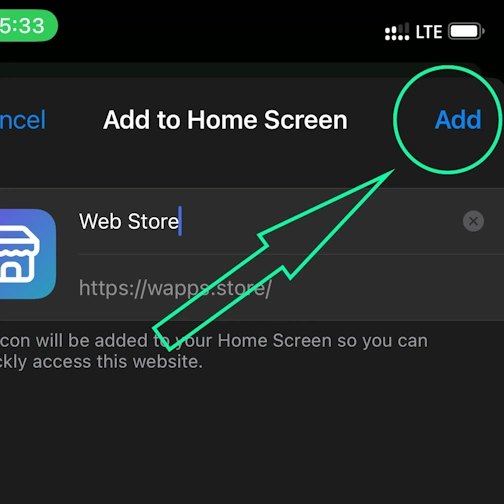
And here tap the 'Add' button. And the App will appear on your iPhone's home screen
Opera - Android
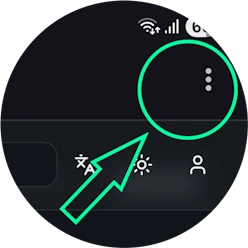
Open the browser menu - 'Three dots' in the top right corner
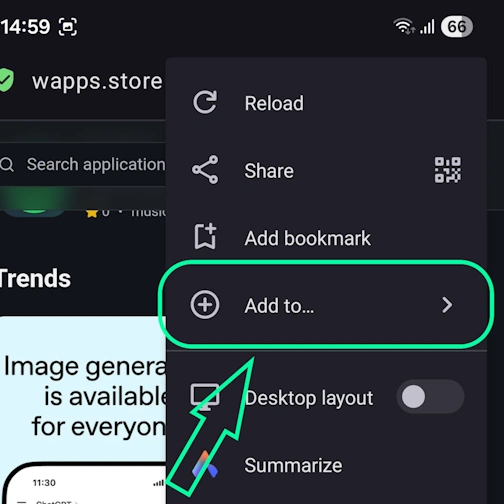
Select the option 'Add to...'
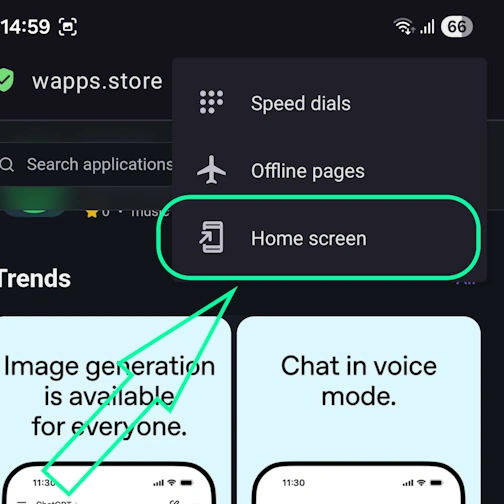
Here select the option 'Home Screen'
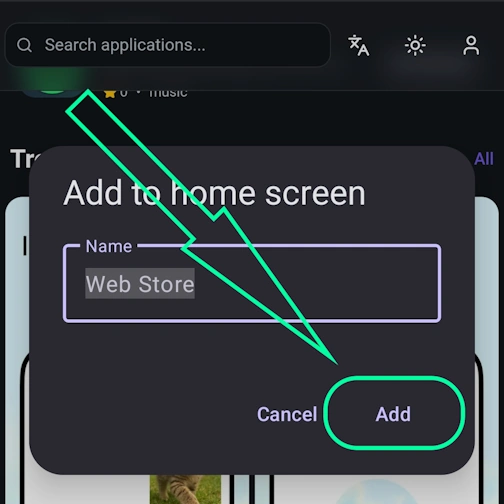
Tap the 'Add' button
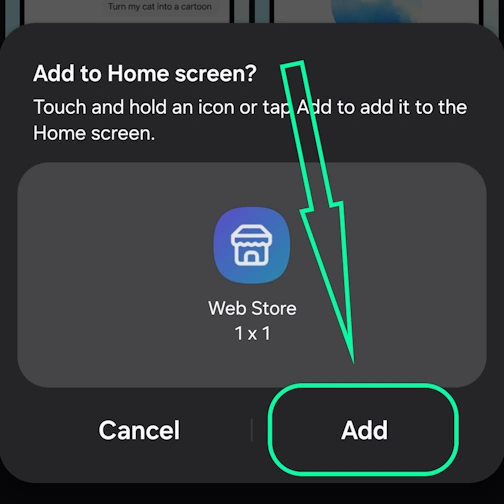
And here confirm - and tap 'Add' again - and the app will appear on your home screen
Safari - iOS
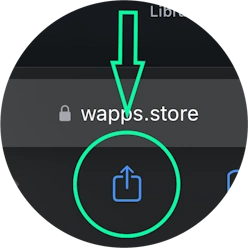
Tap the Share button (square with arrow pointing up) at the bottom of the screen
Select the option: Add to Home Screen
And here tap the 'Add' button. And the App will appear on your iPhone's home screen
Safari - Desktop
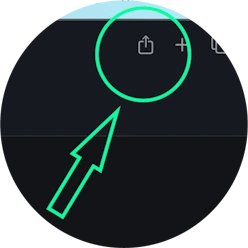
Step 1 for Safari on macOS
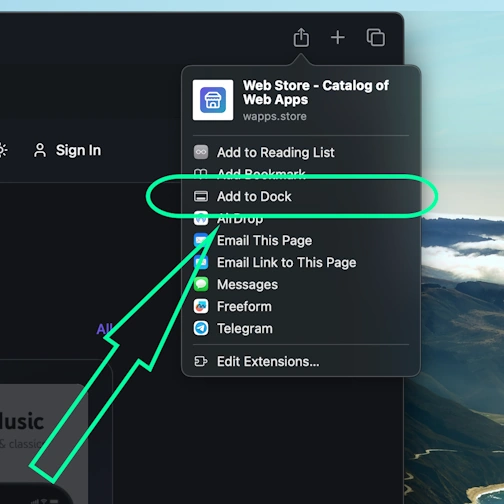
Step 2 for Safari on macOS
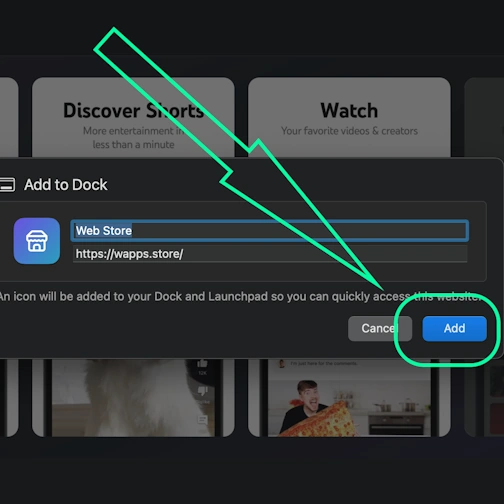
Step 3 for Safari on macOS
Chrome - iOS
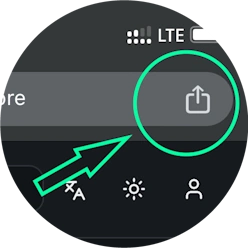
Tap the Share icon in the top right corner, next to the site address
Select the option: Add to Home Screen
And here tap the 'Add' button. And the App will appear on your iPhone's home screen
Chrome - Android
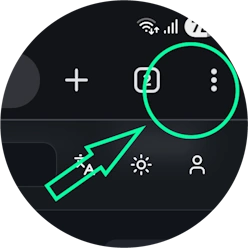
Open the browser menu - three dots in the top right corner
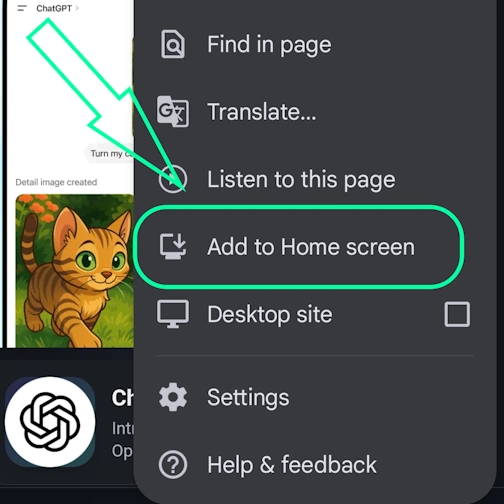
Select the option 'Install app' sometimes it's: 'Add to Home Screen'
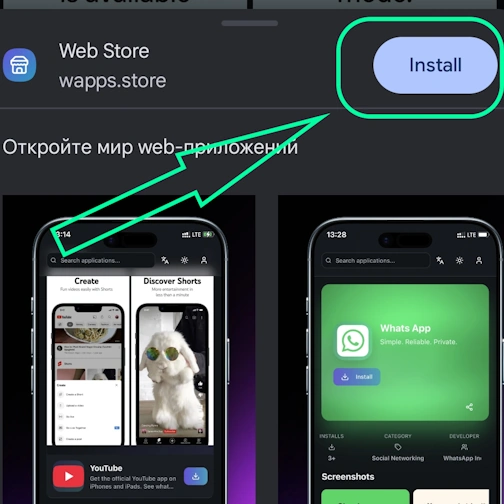
And here confirm the installation - tap 'Install'
Chrome - Desktop
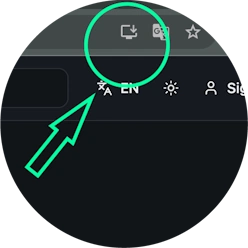
Click the 'Install app' button - icon: computer with arrow pointing down
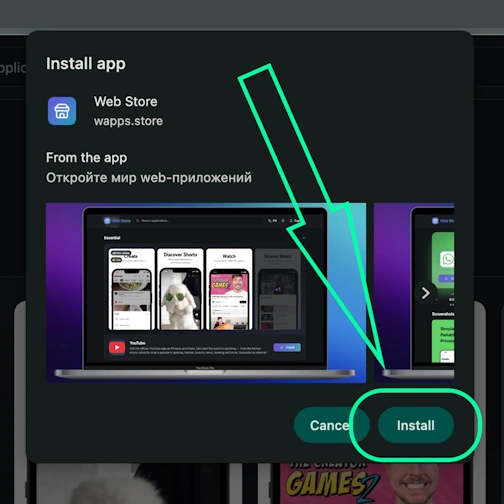
Confirm installation by clicking 'Install'
Edge - Desktop
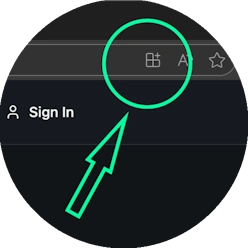
Click the 'Install app' button - icon: 3 blocks with plus sign
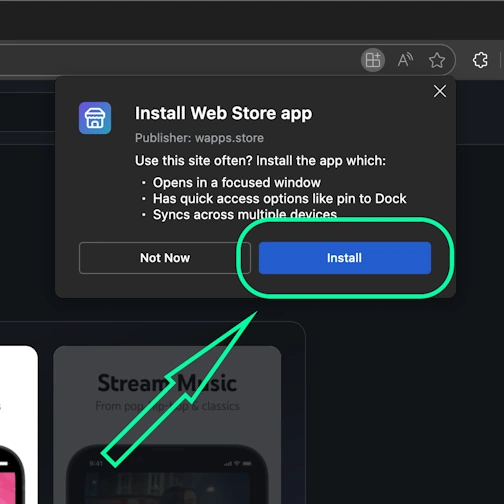
Confirm installation by clicking 'Install'
Edge - Android
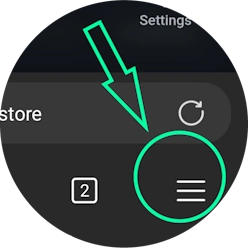
Open the browser menu - 'burger' icon in the bottom right corner, next to the site address
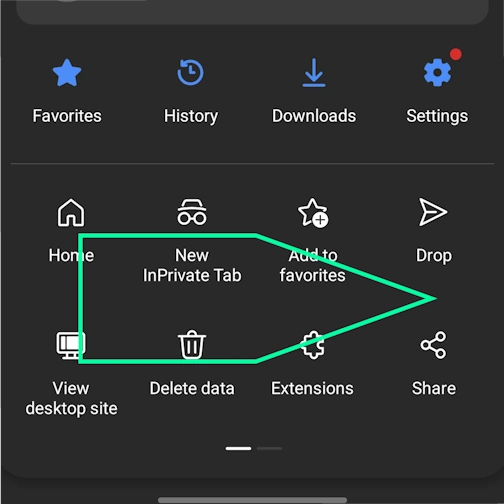
Swipe the menu icons to the right
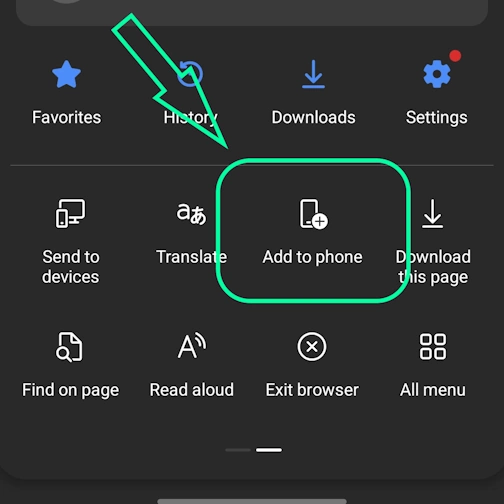
Select the option 'Add to phone'
And here confirm the installation - tap 'Install'
Yandex - iOS
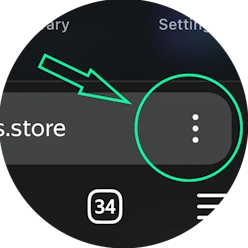
Open the browser menu - three dots in the bottom right corner, next to the site address
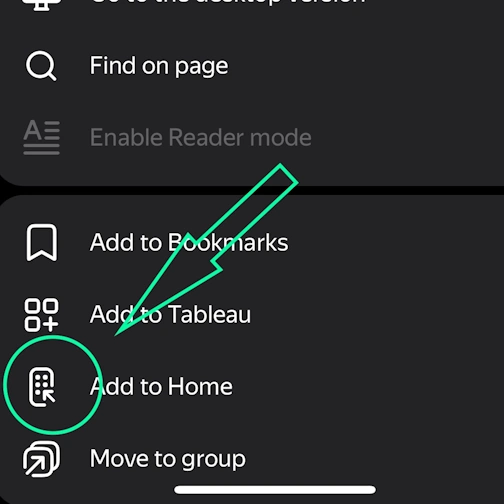
Tap the 'Add to Home' button
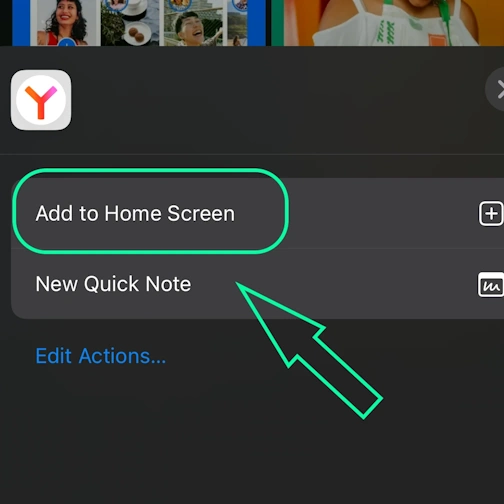
Here select the option: Add to Home Screen
And here tap the 'Add' button. And the App will appear on your iPhone's home screen
Yandex - Android
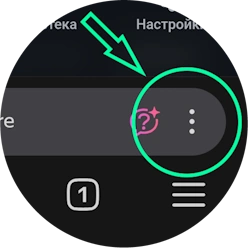
Open the browser menu - three dots in the bottom right corner, next to the site address
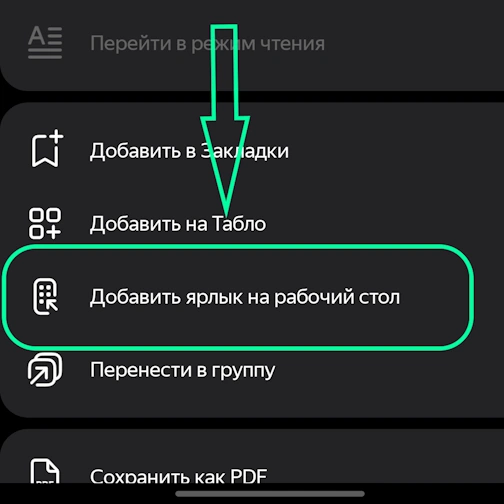
Select the option 'Add to Home Screen'
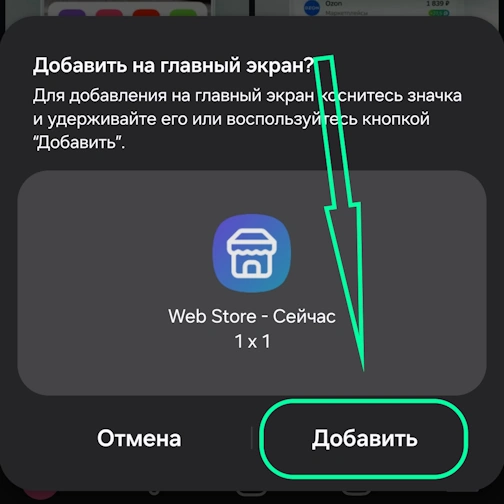
And here tap the 'Add' button - and the app will appear on your home screen
Yandex - Desktop
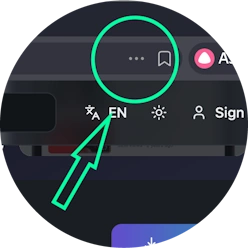
Open the 'Actions menu' - three dots in the top right corner - next to the site address
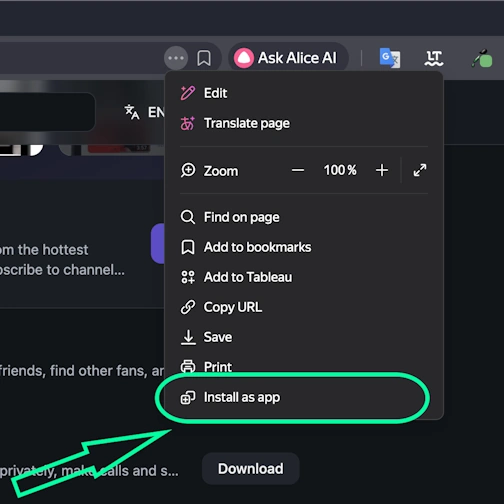
Select the option 'Install as app'
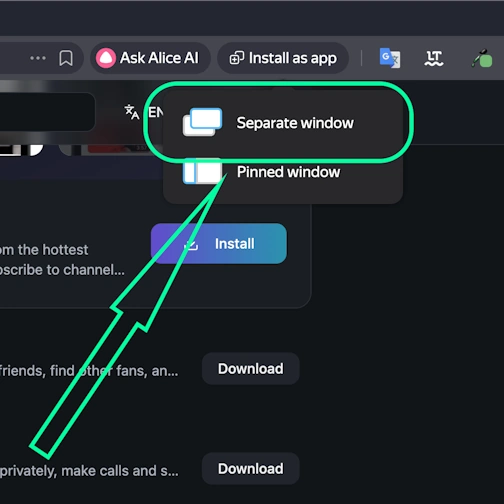
And here select 'Separate window'
Samsung internet - Android
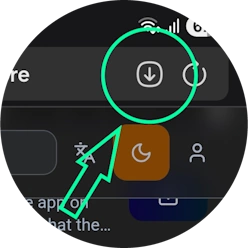
Tap the 'Install app' button - icon: square with arrow pointing down
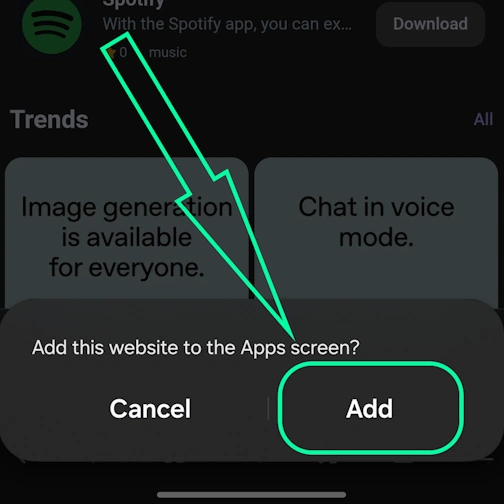
And tap the 'Add' button - and the app will appear on your home screen
Keywords: PWA app, Progressive Web App, install PWA, install PWA app, PWA web app, PWA mobile app, PWA browser app, installable web app, PWA installable web app, PWA without App Store, PWA without Google Play, PWA cross-platform app, PWA offline app, PWA push notifications, PWA for iOS and Android, Progressive Web App install, Progressive Web App offline, Progressive Web App browser, Progressive Web App installable, Progressive Web App web application, Progressive Web App mobile app, Progressive Web App without store, app works without internet, browser app as app, install app from browser, web-app app, install web app, install web-app on phone, web application install, fast PWA installation, instant PWA installation, install PWA quickly, easy PWA installation, simple PWA installation, step by step PWA installation, step-by-step PWA installation, PWA installation instructions, how to install PWA quickly, PWA installation guide, PWA installation manual, Yonote, A single space for team tasks and knowledge, work-productivity